A patio doesn’t need to be an expensive, multi-phase renovation to feel like home. Whether you’re working with a concrete slab, bare ground, or an existing deck, simple patio ideas can turn an overlooked corner of your yard into a genuine outdoor living room. This guide walks through seven practical approaches, from foundation choices and seating layouts to lighting and greenery, that work for DIY budgets and skill levels. Each idea is designed to deliver real function without unnecessary complexity, so you can spend your time actually using the space instead of maintaining it.
Table of Contents
ToggleKey Takeaways
- Simple patio ideas can transform any outdoor space into a functional living area on a budget of $500–$1,500 using gravel foundations, affordable seating, and strategic DIY labor.
- Start with a solid foundation—gravel costs roughly $5 per square foot and is the most budget-friendly option, while pavers offer flexibility and concrete provides durability.
- Add shade and comfortable seating as priorities: a 9×9-foot umbrella or pergola combined with weather-resistant furniture makes the patio actually usable rather than just decorative.
- Layer your lighting with string lights for ambiance, solar stake lights for pathways, and dimmable fixtures for task lighting to extend usable hours into evening safely.
- Phase your patio project over time—start with the base and seating, then add lighting and greenery as budget allows—rather than trying to complete everything at once.
- Incorporate container plants and edging to soften hard surfaces and define spaces without the high cost or commitment of permanent landscaping.
Choose the Right Foundation and Layout
The foundation sets the tone for everything else. Most patios rest on one of three base types: existing concrete slabs, gravel, or pavers. If you’re starting from scratch, gravel is the most budget-friendly, roughly $5 per square foot for materials like pea gravel, which also looks neat and compacts well underfoot. Concrete is durable but permanent: consider its appearance and temperature (it gets hot in summer) before committing. Pavers offer flexibility, you can add or remove them later, but require more labor and cost more upfront.
For layout, sketch a rough footprint before breaking ground. A 10 × 12-foot patio fits a small seating group comfortably: go larger only if your yard and budget allow. Orient seating to catch afternoon shade if you’re in a hot climate, or toward morning sun if you want warmth. Keep pathways clear and at least 2 feet wide so you’re not squeezing between furniture. Sloped patios should drain away from the house at roughly 2% grade (about a quarter-inch drop per foot) to prevent standing water.
If your existing patio is cracked concrete, assess whether patching is enough or if you need an overlay. Small cracks under a quarter-inch wide can be sealed: larger ones often signal movement underneath and may need professional repair or a surface treatment like overlay panels or pavers laid on top.
Add Comfortable Seating and Shade
Good seating and shade transform a patio from “just an outdoor floor” to an actual destination. Start with sturdy, weather-resistant furniture that suits your climate. Aluminum frames with solution-dyed acrylic cushions hold up well in sun and rain: avoid untreated wood unless you’re committed to regular staining. Place seating in a conversational arrangement, ideally facing each other or the view, not the fence.
Shade is equally critical. A 9 × 9-foot umbrella casts good coverage for a small seating area and is portable. Fixed options include pergolas (open lattice allowing dappled light), shade sails (stretched fabric supported by posts), or retractable awnings. Pergolas work well if you’ll add climbing vines: they’re moderately complex to build but add real structure and value. Shade sails are simpler to install and give complete shade in hot climates. All three cost between $300 and $2,000 depending on size and material, but they’re investments that last years.
Seating Arrangement Tips
Arrange seating so people aren’t sitting in harsh sunlight for extended periods. Group smaller chairs and side tables (a 24-inch square or round table is ideal for two chairs) rather than one large centerpiece, it’s more flexible if your group size changes. Keep the arrangement loose: rigid configurations feel formal and cramped. Leave a clear passage from the house to the patio so foot traffic doesn’t disrupt the seating area. If space is tight, consider multi-functional pieces like ottomans with storage or benches that can serve as both seating and storage for cushions or garden tools.
Incorporate Lighting for Ambiance and Function
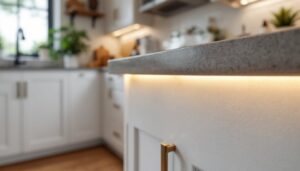
Lighting extends your patio’s usable hours into evening and adds safety when walking. The simplest approach is string lights, warm Edison bulbs slung overhead create instant atmosphere and cost under $50. For permanent solutions, solar stake lights require no wiring and work well for path edges: LED deck lights mounted on posts or railings provide practical task lighting without harsh glare.
If you’re running electric lines, hire a licensed electrician. Running 120-volt outdoor circuits requires proper GFCI protection (ground fault circuit interrupter) as per the National Electrical Code (NEC), weatherproof outlet boxes, and conduit burial at proper depths, this isn’t a shortcut DIY project. Solar lights avoid wiring hassles but are dimmer and need regular battery replacement.
Layer your lighting: overhead strings for ambient glow, bollard or pathway lights for safety, and perhaps a dimmable fixture over a table or seating area for flexibility. Warm color temperatures (2700K) feel more inviting than cool white (5000K). Place lights strategically to avoid glare in eyes and shadows that make walking difficult.
Enhance With Greenery and Landscaping
Plants soften hard surfaces and create a transition between patio and yard. Container plantings in 2–3-gallon pots are the lowest-commitment option, you can move them seasonally and replace them without major digging. Pair upright plants (ornamental grasses, small shrubs) with trailing ones (ivy, trailing petunias) for visual depth. Group odd numbers of pots (three or five) rather than pairs, it feels less formal.
If you’re planting directly in soil, choose species suited to your hardiness zone and light conditions. Shade plants like hostas and astilbe work under pergolas: sunny areas suit coneflowers, black-eyed Susans, and grasses. Leave space between plants so they mature without crowding: most reach their full size in 2–3 years. Poorly spaced plantings look thin initially but avoid the expense and labor of moving oversized specimens later.
Edging keeps patio and planting areas defined. A simple metal or plastic border costs $10–$20 per 8-foot section and prevents gravel or mulch from spilling onto seating areas. Mulch, 2–3 inches deep around shrubs, retains moisture and suppresses weeds. Refresh it annually or as it breaks down, usually in spring. Southern home design and outdoor living inspiration can provide regional plant ideas if you’re unsure what thrives locally.
Create a Budget-Friendly Design
Patio budgets range wildly, but you can build a functional one for $500–$1,500 if you prioritize. Gravel or concrete bases cost far less than pavers. Affordable seating includes plastic Adirondack chairs ($40–$80 each), metal bistro sets ($100–$200), or even a simple bench. Skip the premium cushions initially: basic outdoor fabric versions work fine and can be stored.
Many budget wins come from DIY labor. Laying pea gravel is trivial, level, compact with a hand tamper, spread, and rake. String lights are a 10-minute install. Building raised beds or simple planting boxes from untreated cedar is within reach if you have basic tools and know how to use a miter saw for 45-degree corners. Shop end-of-season sales (August–September) for outdoor furniture at 30–50% discounts.
Phase your project. Start with base and seating this year, add lighting next, then greenery as budget allows. Budget-friendly patio ideas costing about $5 per square foot are achievable with pea gravel and strategic planting. Don’t finance everything upfront, a simple patio that’s complete and usable beats a half-finished luxury one. Avoid impulse purchases: measure twice, buy once.
Conclusion
A transformed patio is within reach without professional design fees or contractor overhead. Start with a solid foundation, add shade and seating that match your climate, layer in lighting and greenery, and phase your spending so each step feels complete. The goal isn’t a magazine-spread perfection, it’s a space that draws you outside and works for how you actually live. Build it yourself, use it every weekend, and refine it as you learn what works.