A wrap around deck transforms your home’s exterior into a functional living space that connects multiple rooms and embraces your yard. Unlike a standard single-side deck, a wrap around deck extends along two or more sides of your house, creating continuous outdoor flow and maximizing usable square footage. Homeowners are increasingly investing in these designs because they offer flexible entertaining zones, improved curb appeal, and better access to different areas of the property. Whether you’re planning a modest three-sided addition or a full perimeter wrap, understanding your options, from material selection to layout, makes the difference between a stunning upgrade and a costly mistake. Let’s walk through what makes wrap around decks special and explore seven creative design strategies for 2026.
Table of Contents
ToggleKey Takeaways
- A wrap around deck extends along two or more sides of your house, creating distinct entertaining zones and maximizing usable outdoor space without the cost of building separate decks.
- Wrap around deck designs range from contemporary minimalist styles with composite decking and metal railings to traditional rustic aesthetics using natural wood, each requiring different maintenance commitments.
- Material selection is critical: pressure-treated lumber costs $0.60–$1.50 per foot, composite decking runs $1.50–$4.00 per foot with minimal maintenance, and edge banding and proper flashing prevent water damage on the increased perimeter.
- Proper planning includes sketching to scale, accounting for door swing clearances of 36 inches, considering corner design, and checking local frost depth requirements (typically 36–48 inches) for footing stability.
- Building a wrap around deck in phases, mixing materials strategically, handling prep work yourself, and sourcing materials directly from distributors can reduce costs by 10–15% or more while maintaining structural integrity.
What Is a Wrap Around Deck?
A wrap around deck is a multi-sided elevated platform that hugs at least two perpendicular sides of your house. It differs from a standard deck in scale, complexity, and structural demand. Instead of one linear structure, you’re building interconnected sections that turn corners, navigate roof overhangs, and often accommodate doors and windows from multiple rooms.
The practical appeal is straightforward: you gain distinct entertaining zones without the expense of building three separate decks. One side might become a breakfast nook off the kitchen, while another transitions into a fire pit seating area visible from the living room. The continuous design also improves traffic flow, guests move naturally around the house rather than bottlenecking at a single access point.
Structurally, wrap arounds demand more footings, additional ledger attachments (often requiring flashing and bolts), and careful attention to corners where sections meet. Many jurisdictions require permits for any deck over 24 inches high or with footings near property lines, so check local codes early. The complexity isn’t a dealbreaker, it just means front-loading your planning and respecting the structural requirements prevents sagging, rot, and safety issues down the road.
Modern Wrap Around Deck Designs and Styles
Contemporary and Minimalist Designs
Contemporary wrap arounds favor clean lines, mixed materials, and open sightlines. Picture composite decking in gray or charcoal paired with horizontal metal railings, these elements appeal because they’re low-maintenance and age uniformly without the gray weathering of untreated wood.
Minimalist designs often incorporate floating steps, which appear to hover without visible stringers. Achieving this look requires steel support beams hidden beneath the tread, making it a job for experienced builders. Built-in seating integrated into the deck perimeter eliminates clutter and maximizes usable space. Two-tone decking, say, a lighter center with darker borders, creates visual interest without ornament.
Color palettes skew toward neutrals: white, black, dove gray, and warm taupes. These choices complement modern siding and blend with landscape lighting, which many contemporary designs layer in for ambiance and safety.
Traditional and Rustic Aesthetics
Traditional wrap arounds celebrate natural wood grain and classic proportions. Cedar or pressure-treated lumber with stained finishes maintains warmth and character while offering proven durability. Turned balusters, decorative lattice panels, and post-to-rail joinery signal craftsmanship, details that echo your home’s period or regional style.
Rustic designs embrace weathering. Some homeowners intentionally allow untreated cedar to silver over time, viewing it as patina rather than decay. Others commit to a finishing schedule, resealing every two to three years. The trade-off is worth it to many: rustic decks feel organic and age gracefully, especially in forested or farmland settings.
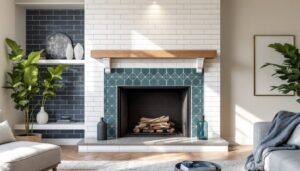
Traditional railings often feature balusters on 4-inch centers (required by code in most jurisdictions for child safety), while rustic designs might emphasize wider spacing with heavier posts. Composite or pressure-treated materials work equally well for rustic designs: the aesthetic comes from proportions and joinery, not material alone. References from Southern Living’s outdoor design collection showcase regional takes on traditional wrap arounds that inspire authentic, locally rooted additions.
Material Selection and Durability Considerations
Material choice determines maintenance burden, cost trajectory, and lifespan. Pressure-treated lumber (rated for ground contact) costs $0.60–$1.50 per linear foot and lasts 15–20 years with basic care. Cedar or redwood runs $1.00–$2.50 per foot, offers better aesthetics, but requires annual sealing to prevent rot, a real commitment if you’re building a large wrap around.
Composite decking (wood fiber bound with plastic resin) ranges from $1.50–$4.00 per foot and needs no staining: it resists rot, splinters, and insect damage. The tradeoffs are higher upfront cost and slight heat retention in dark colors. Aluminum railings and fascia trim pair well with composite, creating a minimal-maintenance design that many busy homeowners prefer.
Edge banding and flashing matter enormously on a wrap around because you have more perimeter exposed. End grain absorbs water fastest: wrapping board ends with aluminum caps or flashing prevents water from creeping into the wood structure. Where your deck ledger bolts to the house, install self-adhesive flashing tape beneath the ledger board to channel water away from your rim joist.
Footing depth varies by frost line, typically 36–48 inches in northern climates, less in warmer regions. Check your local frost depth requirement: undersized footings heave and shift in freeze-thaw cycles, destabilizing the entire structure. Sonotubes (concrete form tubes) are standard: they cost under $5 each and take 30 minutes to set. Concrete for footings runs about $100–$150 per yard (typically two to three yards for a wrap around), and paying for delivery is worth avoiding a mixing mishap on site.
Layout Planning and Space Optimization
Before ordering materials, sketch your wrap around to scale on graph paper or use a deck design tool online. Note door swing clearances, a door swinging outward needs 36 inches of deck space in front of it. Measure overhead obstructions: roof overhangs, gutters, and low eaves constrain railing height and create awkward transitions.
Corners are the design decision point. A tight 90-degree corner suits entertaining areas: beveling or radiusing the corner (rounding it with an arc) softens the look and improves traffic flow. Each approach requires different framing: a tight corner needs blocking and careful joist layout, while a beveled corner involves angled cuts and a steeper learning curve.
Step placement affects usability. Centered steps feel balanced: offset steps create a rhythm. Six-inch treads with a 7-inch rise (close to standard interior stair geometry) feel comfortable for multiple uses per day. Wider decks benefit from stairs on two sides, it prevents bottlenecks during gatherings and improves evacuation if needed.
Sightlines matter. If your wrap around surrounds a bedroom, consider privacy screening on one side using slatted panels or raised beds. A two-tiered layout, main deck level and a lower lounge area, adds visual complexity and zoning without overwhelming a modest lot. Referencing garden design concepts from Gardenista helps integrate planters and landscape elements that soften deck edges and tie the structure to its surroundings.
Budget-Friendly Tips for Wrap Around Decks
Build in phases. Start with the high-traffic, high-visibility section off your main living area. Once that’s proven and you’ve refined your budget, add the second or third section. A phased approach spreads costs over multiple years and lets you adjust your design based on real-world use.
Mix materials strategically. A pressure-treated substructure with a composite deck surface costs less than all-composite while delivering a hybrid aesthetic and durability. Simpler railing designs (horizontal cables or metal balusters instead of ornate turned spindles) cut costs without sacrificing safety or style.
Handle your own prep work and finishing. Demolishing an old patio, digging and setting footings, and staining are labor-intensive but learnable tasks. Saving $3,000–$5,000 in labor by DIYing prep justifies renting a power auger for a day. Hire licensed builders only for structural work: ledger flashing, load-bearing connections, and code compliance inspections.
Source materials intelligently. Buying composite decking directly from a distributor instead of a big-box store often yields 10–15% savings on bulk orders. Pressure-treated lumber prices fluctuate: lock in pricing in off-season (late autumn) if possible. Used or reclaimed wood adds character on a budget, though inspect it carefully for hidden rot or nails.
Skip overengineering. Your local building department specifies joist spacing, ledger bolt patterns, and footing depth. Meeting code exactly costs less than over-building, which wastes material and labor. Get a final inspection, it protects your investment and your home’s resale value. Step-by-step planning is easier with detailed project tutorials available on Instructables, where builders share proven framing strategies and material combinations.